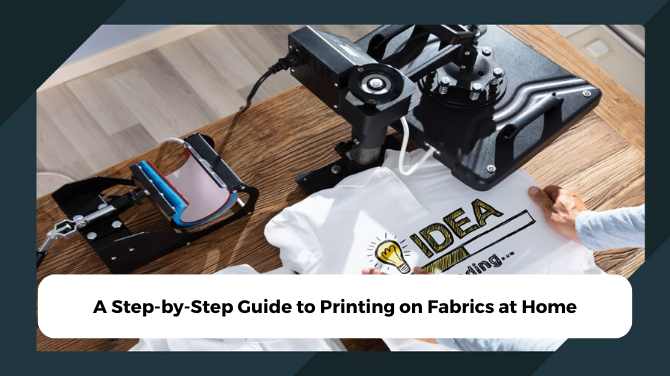
Printing on fabrics at home has become an increasingly popular way to personalize clothing, accessories, and home décor items. Whether you want to add a custom design to a t-shirt, create your own unique textiles, or simply explore a fun and creative project, fabric printing at home is easier than you might think. With the right tools and techniques, you can transform ordinary fabric into something extraordinary without the need for expensive equipment or professional help.
This detailed guide will walk you through various methods of printing on fabrics at home, from using an inkjet printer to more traditional approaches like block printing and screen printing. We’ll cover the materials you’ll need, the steps involved, and tips for achieving the best results.
Materials Needed for Home Fabric Printing
Before diving into the different printing techniques, it’s essential to gather the necessary materials. Depending on the method you choose, the supplies may vary slightly, but here are some common items you’ll need:
– Fabric: Cotton, linen, and polyester are popular choices for fabric printing. Ensure the fabric is clean and ironed to avoid wrinkles.
– Ink or Dye: Fabric-specific inks or dyes work best to ensure long-lasting prints.
– Transfer Paper (for inkjet printing): Special transfer paper allows you to print images using a regular inkjet printer.
– Stencil or Block (for stencil/block printing): These are used for creating your designs.
– Silkscreen (for screen printing): A mesh screen that allows ink to pass through to the fabric.
– Brayer/Roller: To evenly spread ink on the fabric.
– Iron or Heat Press: For setting the ink or transferring designs.
– Painter’s Tape or Adhesive Spray: To hold your fabric in place while you work.
1. Inkjet Printing on Fabric (Transfer Paper Method)
One of the easiest ways to print on fabric at home is using an inkjet printer and transfer paper. This method is great for printing intricate designs, logos, or photos onto fabric.
Steps:
1. Choose Your Design: Select the image or design you want to print. You can create your own design using graphic software or download one from the internet.
2. Mirror the Image: For text or images that need to appear in a specific orientation, make sure to mirror the image before printing it onto transfer paper.
3. Print the Design: Use a regular inkjet printer to print the image onto transfer paper. Make sure you print on the correct side of the transfer paper.
4. Prepare the Fabric: Lay your fabric flat and ensure it’s free of wrinkles. Iron it if necessary.
5. Transfer the Image: Place the transfer paper on the fabric with the printed side facing down. Use a hot iron or heat press to apply pressure for the recommended time (typically around 3-5 minutes). Follow the instructions on the transfer paper packaging for best results.
6. Peel the Transfer Paper: Once the fabric has cooled slightly, peel off the paper backing to reveal the printed design.
7. Set the Print: For added durability, go over the print again with a hot iron (without steam) for a few minutes.
2. Block Printing on Fabric
Block printing is a traditional method of fabric printing that involves carving designs onto a block of wood, rubber, or linoleum. This technique allows you to create beautiful, hand-printed textiles with a personal touch.
Steps:
1. Create a Design: Sketch out the design you want to print. Remember that it will be reversed when printed, so consider this while designing.
2. Carve the Block: Use carving tools to carve your design into a block of wood or linoleum. If you’re a beginner, you can purchase pre-made printing blocks.
3. Prepare the Fabric: Lay the fabric flat on a clean surface and secure it using painter’s tape or adhesive spray.
4. Apply the Ink: Roll fabric ink onto the carved block using a brayer or roller.
5. Print the Design: Press the inked block firmly onto the fabric. Lift the block carefully to reveal the printed design. Repeat the process for multiple prints.
6. Set the Ink: Once you’ve printed your design, allow the ink to dry. Use an iron to heat-set the ink and make it permanent.
3. Screen Printing on Fabric
Screen printing is a more advanced method but yields professional-quality results. It involves using a mesh screen to transfer ink onto fabric through a stencil.
Steps:
1. Prepare the Screen: Stretch a fine mesh screen over a frame. You can buy pre-made screens or make your own using silk or polyester mesh.
2. Create a Stencil: Using a stencil of your design, block off the areas where you don’t want ink to pass through. You can use tape or photo emulsion to create the stencil on the screen.
3. Place the Fabric: Lay the fabric flat and secure it in place. Position the screen over the fabric where you want the design to be printed.
4. Apply the Ink: Pour fabric ink onto the screen and use a squeegee to spread it evenly over the stencil.
5. Print the Design: Pull the squeegee across the screen in one smooth motion to transfer the ink through the stencil onto the fabric.
6. Lift the Screen: Carefully lift the screen to reveal the printed design.
7. Set the Ink: Allow the print to dry before heat-setting it with an iron or heat press.
4. Stencil Printing on Fabric
Stencil printing is a simple and effective method to create custom patterns or designs on fabric. It involves using pre-cut or handmade stencils to guide the placement of ink or paint.
Steps:
1. Create or Choose a Stencil: You can create your own stencil using cardstock or plastic sheets, or buy pre-made stencils from a craft store.
2. Secure the Stencil: Place the stencil on the fabric and secure it with painter’s tape to prevent movement during printing.
3. Apply the Paint: Use fabric paint and a sponge or brush to dab paint over the stencil. Make sure not to use too much paint to avoid smudging.
4. Remove the Stencil: Once you’ve applied the paint evenly, carefully lift the stencil off the fabric.
5. Set the Paint: Allow the paint to dry, then use an iron to set the paint and make it permanent.
Tips for Successful Fabric Printing at Home
– Test First: Always do a test print on a small piece of fabric before printing on the final product.
– Use the Right Ink: Fabric-specific inks or dyes ensure the print is durable and survives washing.
– Heat Setting: Most inks and paints require heat setting to become permanent. Follow the manufacturer’s instructions to avoid fading.
– Wash Carefully: Hand wash or use gentle cycles to preserve your printed designs.
Conclusion
Printing on fabric at home is a rewarding and creative process that allows you to customize your textiles with unique designs. Whether you’re using an inkjet printer, block printing, screen printing, or stencils, the key to success lies in careful preparation and attention to detail. With the right materials and techniques, you can create high-quality, personalized fabrics for clothing, home décor, or craft projects, all from the comfort of your home.
If you’re looking for printed mens shirt, please check out our shop.